Christmas Treats: Chocolate-Dipped Pretzel Rods


Everybody knows how much I love Christmas – and of course, making treats for friends is one of my favorite things about this season! Since we had a ton of red chocolate left over from Ruby’s birthday party, my mom came up with the great idea of using it with pretzels. I especially loved the idea, because a pretzel dipped in less than .5oz of chocolate is almost guiltless! I decided to do 4 different types of decorations for them and package them in clear plastic bags. The packaging was a lot simpler than my usual stuff, but the pretzels ended up being so pretty that they just had to be the main focal point!

Here’s how they turned out:

Close-up on sprinkles:

In sets of three, before packaging:

All pretty and ready to go!

Now I’m getting excited about what I’ll make for our 1st annual Christmas Eve Open House!

Handmade and Homemade just for Ruby

This post is sooo tardy, but it’s a week later and we’re still recovering from Ruby’s 1st birthday party! Of course, it was a lot of fun, but a huge reason it was so special was because of all the loving preparation that went into things from both sides of the family! This post is to honor all of the handmade and homemade special details of Ruby’s birthday party!

#1: Go-ims

Go-ims are traditional decorative “towers” that are usually trimmed with hard candies and/or beans for a Korean 1st Birthday Party (dol). Ed, his mom, and dear friend/”grand uncle” Wonil lovingly spent days and hours working on these for Ruby’s party! They used white beans, black beans, kidney beans, red/white/pink chocolate spree, black m&m’s and mentos to decorate all 3 of the go-ims. Ed designed all 3 of them first – he found an awesome tiger template to use in honor of Ruby being born during the year of the tiger, and he then he put together a retro-looking one with Ruby’s name and starbursts. Finally, he mapped out a patterned design with all red, pink & white candies to look more pop-ish and modern.

Halmoni decided she’d like to work on the tiger and Wonil worked on the one with Ruby’s name. Here they are hard at work!

As you can see, each individual candy and/or bean was glued to the paper towel roll (which was covered with poster board to make it smooth) one at a time. Patience and determination prevailed! I wish we had remembered to take a picture of the back of Halmoni’s, because during her quest for perfection – she couldn’t get the mentos to line up evenly in the back! So, she decided to use the beans and m&m’s to put Ruby’s birthdate (11-02-10) on the back to even things out.

This is the only pic we have where you can see part of it – but it looked great!

Proud and happy here on evening #2 as more progress is made:

The go-ims were beautiful, and we’ll always have memories of special bonding time with Ed’s mom and Wonil during the time these were made. I love this one of Ruby with her Halmoni on the day of her party:

#2: Cherry cookies

I wanted Ruby’s party to have a “retro cherry” theme. I saw a birthday party online that was a big inspiration, and it had these perfect cookies with cherries on top that I was dying to re-create (with my own spin on them of course). Since my parents are known for their masterful baking skills (they made 150 bride cookies and 150 groom cookies for favors at our wedding!), I asked if they’d help me out. Mom baked 48 sugar cookies and whipped up a batch of her own buttercream fondant, and Dad set out to cut out leaves and cherries to decorate each cookie.

This was at the beginning when he was using royal icing to “glue” the fondant base to the top of each cookie.

Moving on to adding the duo of cherry pieces …

Then, he took the extra leaves that were left over to cut stems for each cherry (he’s meticulous!). It really made them look all that more polished … and they tasted as good as they looked!

I can’t thank my parents enough for this … there’s no way I could’ve pulled off this impressive array of cherry-themed treats without them!!!
Red Velvet cupcakes with a cherry-on-top:

Mini-Cherry Cheesecakes and Chocolate Cake Balls:
 
The entire spread in all of its glory!

#3 Favor jars filled with Cherry Sours
 
I had been saving baby food jars for awhile in hopes of using them somehow and decided to use them for favors at the party. Pretty simple, but made with love nonetheless. What can I say, I’m a stickler for a theme …

#4 Ruby’s Retro Tunes Playlist

Ed & I sorta have a reputation when it comes to mix CDs. However, since the actual process of burning CDs seems so wasteful these days with folks using MP3 players and all, we decided to ditch the actual CD and just post our compilation for download (You can download the playlist here, if you want). The mix is simply songs that make Ruby smile, with a retro slant (of course!).

More party blogging to come – but all the details deserved their own post!

Music Mixes for 2010

To wrap up 2010, Ed & Carrie both made music compilations. We came from very different points of view this year – Ed discovered a lot of new stuff he loved, and came up with a solid comp of favorites. Carrie was pretty disenchanted and bored with the whiny indie rock that was so popular this year, and after resigning herself to the fact that she couldn’t just burn the entire Arcade Fire and Broken Bells albums in one comp, she went a different direction! (Also – just wondering: What’s with every indie band having some sort of nature/animal themed name? Deerhunter, Deerhoof, Antler Motel, whatever …)

So, please feel free to download our mixes. Have anything you’d suggest? Leave a comment here!

>>Click to download “Ed’s 10 in 10”
Track list:

1. Jardin Du Luxembourg – The Ghost of a Saber Toothed Tiger
2. Time of the Assassins – Charlotte Gainsbourg
3. Swim – Surfer Blood
4. Girl in Love – Smith Westerns
5. We Used to Wait – The Arcade Fire
6. Tighten Up – The Black Keys
7. On the Vista (feat. Mos Def) – BlakRoq
8. Stylo (feat. Mos Def & Bobby Womack) – Gorillaz
9. Something in the Way – Best Coast
10. It’s Working – MGMT


Click to download Carrie’s “Forget 2010!”
Old late-70s/early 80s punk and new wave sounded really good to me this year, so this comp was intended to reintroduce and re-familiarize you with some greats from that time. You may have heard them all before, but now you have them all in one place!

Track list:

Kim Family Christmas Eve 2010


Ask us a year ago if we would’ve thought that we’d be celebrating Christmas Eve in a new house with a new baby, and we probably wouldn’t have believed it! This has been quite a year, and that made this year’s Christmas Eve dinner even more special.
As usual, we were hosting Ed’s mom, dad, aunt and uncle for dinner. We even have a dining room now! We set our modern table in our signature red and white stripes, and for this year’s place settings I decided to do sugar cookie stars in red and green.


Also new for this year, I made a roast …


I loaded up an oven bag with potatoes, carrots and onions and cooked it for about 2.5 hours.


I did it!


The candles were lit and we waited for our guests to arrive.


Even Ruby got dressed up in her special Christmas Eve dress from Halmoni!

Tonight’s dinner consisted of Ed’s mom’s amazing spinach salad with pomegranate, cranberry, blueberry and almonds … My roast with potatoes and carrots, wild rice, roasted brussel sprouts and mushrooms, and Ed’s aunt brought the cake for dessert!


Even though we didn’t exchange gifts this year, the grandparents couldn’t resist buying a little something for Ruby. Harabuji bought Ruby two sets of pajamas, and Halmoni bought Ruby a special animal print dress since she was born in the year of the Tiger!


After everyone left, it was time for Ed to read Ruby ‘Twas the Night Before Christmas. Grandma & Papaw Facey bought us our own copy of the book so we could start the tradition of reading it to her before bedtime each Christmas Eve like my dad did for me!


This Christmas Eve was a wonderful night spent with our family in our new home. It just can’t get any better than that! Stay tuned for part two tomorrow! :)

Christmas Treats!

From Homemade Craftiness

As we’ve done for the past few years now, Mom & I got together to make our annual Christmas goodies. We decided to be a little different this year and try to make some candy! My favorite holiday treat is Peppermint Bark, so I definitely wanted to try making my own, and then I decided to make Peanut Brittle – because its old school and a holiday classic!

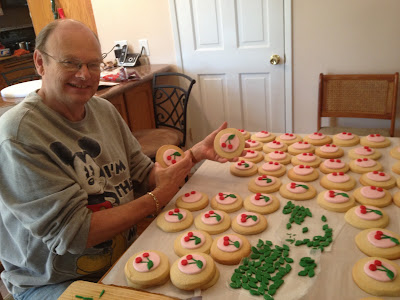
(See last year’s cookie packaging or my gingerbread and pumpkin loaves from the year before)

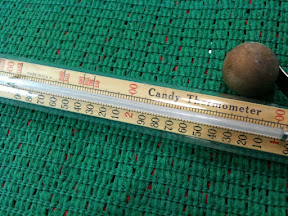
Its a good thing my mom had a candy thermometer. Talk about old school, this belonged to my Dad’s grandmother. The display shows “Soft Ball” & “Hard Ball” stages, as well as “Crack” stage and “Hard Crack” stage. Looking at it, I thought to myself what a lost art candy making is becoming. After all, “soft ball stage”?!? What? (click the photo to enlarge)

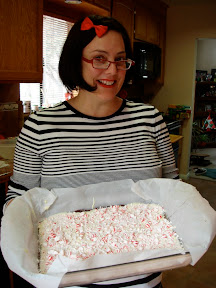
The Peppermint Bark was easy enough … just melt semi-sweet chocolate, add peppermint extract, pour in a pan and top with a layer of crushed peppermint candies. Set it in the fridge and let it cool for about an hour. After its hard, just repeat the same step with white chocolate and make a second layer. I love how festive it looks with the crushed peppermint candies on top! (It’s also no secret that my signature holiday aesthetic is red & white stripes).

The Peanut Brittle wasn’t as easy – but it’s something my mom & I won’t soon forget! It’s quite a process, but the end result was some seriously authentic Peanut Brittle! Here are a few shots throughout the process:


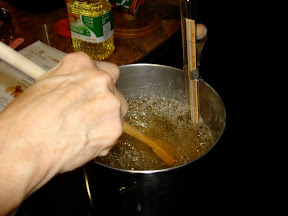
First, we had to boil the sugar and corn syrup until it reached 250 degrees (thanks, Candy Thermometer!) …


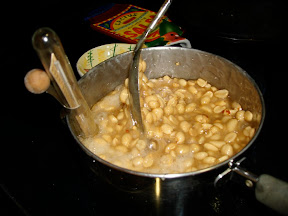
Then, we could add the peanuts and butter, and had to keep stirring until we hit Hard Crack Stage (290 degrees!) …


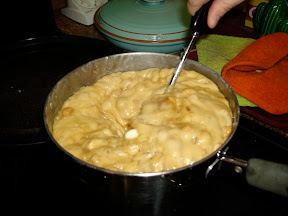
Once we added the baking soda, we got a quick, frothy surprise! This is when it really starts to look like the real deal. You have to get it out and pour into the pans quickly though, or else you’ll burn it all up …


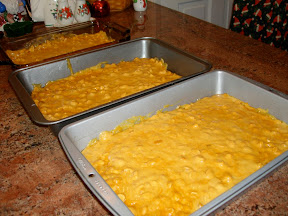
It sets until cooled, then you break it all up. We got about 2.5 lbs. of brittle from this batch.


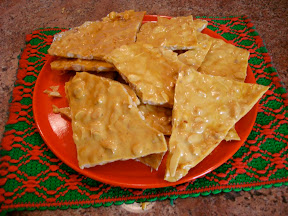
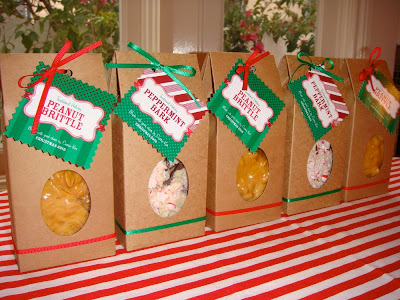
The finished product, in all it’s glory!

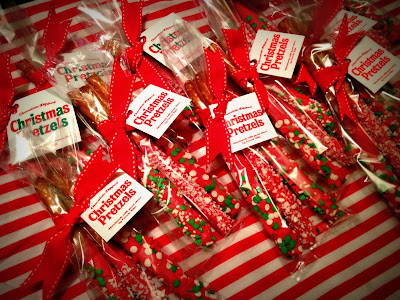
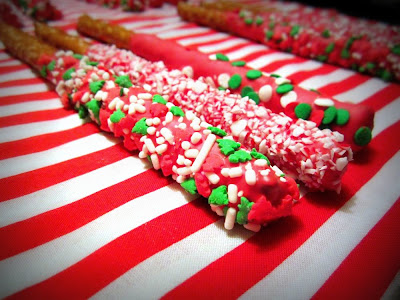
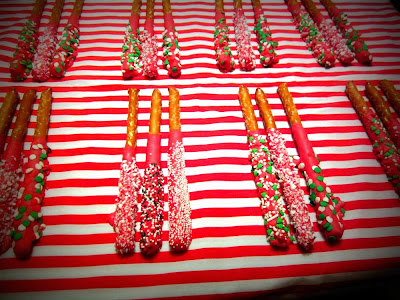
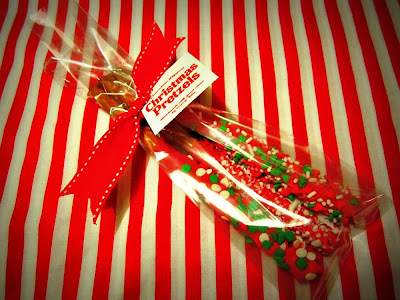
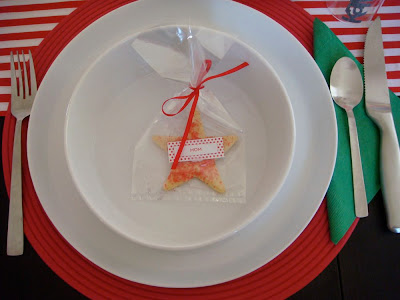
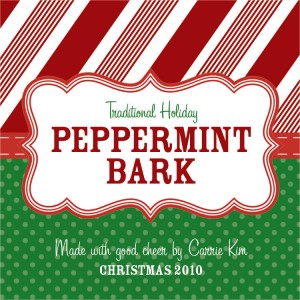
Of course, I always enjoy making the goods look good, so I worked on my custom tags for each candy:

I hope everyone enjoys it as much as I did making it! And of course – thanks, Mom!